

Are you finding it a bit tricky to figure out how to remove the filter from your range hood? Well, fret not! We’re here to simplify the process for you. Range hood filters play a crucial role in keeping your kitchen air clean by trapping grease, smoke, and odors. However, they need regular cleaning or replacement to maintain their efficiency.
How To Remove Range Hood Filter? To remove a range hood filter, start by turning off the range hood and ensuring it’s cool. Most filters are located beneath the hood. Open the hood and locate the filter, usually positioned toward the back or center. Depending on the model, you might need to release a latch or unscrew a fastener to access it. Carefully slide or lift the filter out, being mindful not to damage it. Once removed, clean the filter according to the manufacturer’s instructions, typically by washing it with warm, soapy water. After cleaning and drying, reinsert the filter, secure it in place, and close the hood. Regular filter maintenance ensures efficient ventilation in your kitchen.
In this guide, we’ll walk you through the step-by-step process of removing your range hood filter. You don’t need any special skills or tools – just a few minutes of your time and a little know-how. Whether you’re a seasoned DIY enthusiast or a newbie in the kitchen, our easy-to-follow instructions will help you keep your range hood in top shape. So, let’s get started and ensure your kitchen stays fresh and free of unwanted odors.
“Unveiling the Secrets: Removing Your Range Hood Filter Like a Pro”
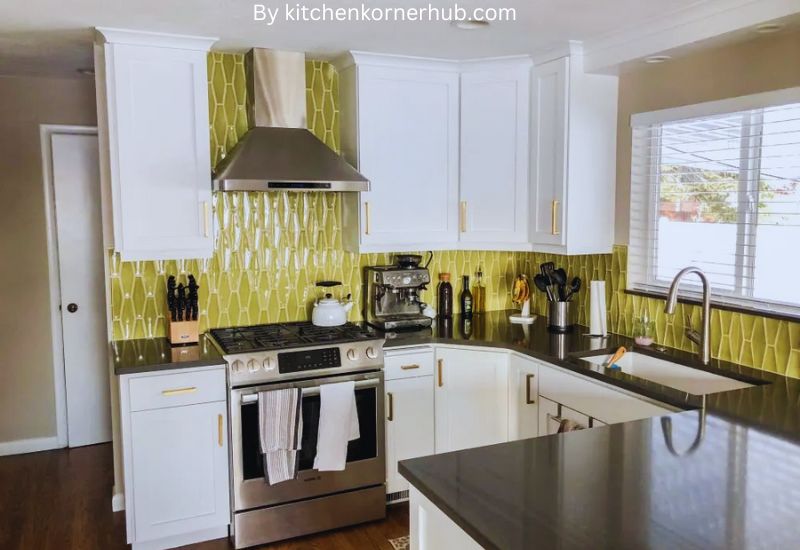
When it comes to maintaining a clean and efficient kitchen, one often overlooked yet essential task is cleaning your range hood filter. A range hood filter plays a crucial role in trapping grease, odors, and airborne particles, ensuring that your kitchen remains fresh and smoke-free.
However, many homeowners find themselves mystified by this seemingly complicated process. In this guide, we will demystify the art of removing your range hood filter like a pro, making it a breeze for you to keep your kitchen in top-notch condition.
Understanding the Basics
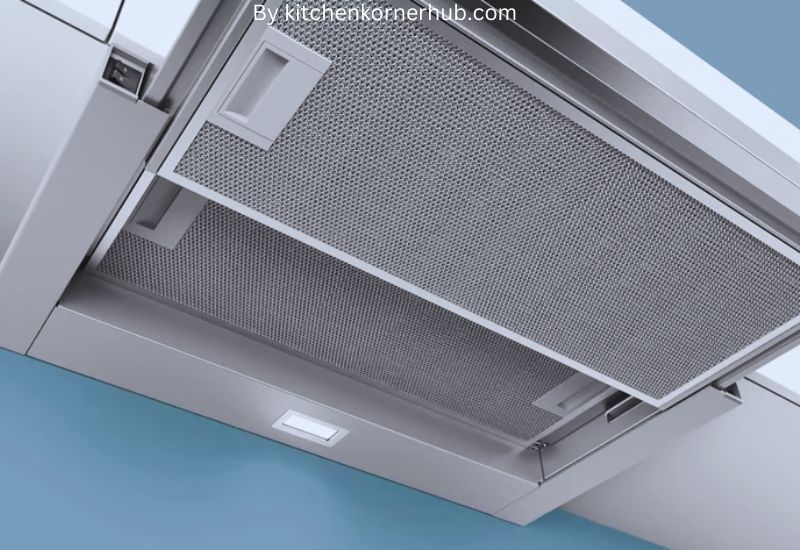
Before diving into the nitty-gritty of removing your range hood filter, it’s crucial to understand what you’re dealing with. Range hood filters come in two primary types: mesh filters and baffle filters.
Mesh filters are made of layers of aluminum or stainless steel mesh, while baffle filters consist of multiple metal panels stacked together. Identifying your filter type is the first step towards efficient cleaning.
Gather Your Tools
To tackle this task like a pro, gather the necessary tools beforehand. You’ll need a screwdriver, a bucket or basin, warm soapy water, a soft-bristle brush, and a towel. These items will help you clean and reinstall your range hood filter without any hassle.
Safety First
Before you begin, ensure your safety by turning off the range hood and disconnecting the power source. This precaution is crucial to prevent any electrical mishaps and ensures a safe cleaning process.
Removing the Filter
For mesh filters, removing them is relatively straightforward. Most mesh filters are secured by a latch or clips. Simply press the latch or release the clips and slide the filter out gently. For baffle filters, you may need to use a screwdriver to remove any screws holding them in place. Once removed, place the filter in your bucket or basin.
Cleaning the Filter
Cleaning your range hood filter is where the magic happens. Submerge the filter in warm, soapy water and let it soak for about 15-20 minutes.
After soaking, use a soft-bristle brush to scrub away the built-up grease and grime. Rinse the filter thoroughly with clean water and allow it to air dry or use a towel to dry it completely.
Reinstallation
Once your filter is clean and dry, it’s time to put it back where it belongs. Follow the reverse of the removal process, making sure to secure the filter in place properly. For mesh filters, reattach the latch or clips, while for baffle filters, use the screws to secure them back in position.
Regular Maintenance
To keep your kitchen ventilation system running smoothly, make a schedule for regular filter cleaning. Depending on your cooking habits, this may range from every few weeks to a few months.
Maintaining a clean filter not only ensures your kitchen remains odor-free but also extends the lifespan of your range hood.
“The Art of Range Hood Filter Liberation: Step-by-Step Guide”

Are you tired of that greasy, lingering smell in your kitchen every time you cook? It’s probably time to give your range hood filter a little TLC.
The range hood filter is your kitchen’s unsung hero, tirelessly trapping grease and odors from the air. In this step-by-step guide, we’ll take you through the process of liberating your range hood filter from the gunk and grime that accumulates over time, helping you keep your kitchen fresh and clean.
Gather Your Supplies
Before you begin, make sure you have everything you need. You’ll want to have a screwdriver, a bucket, hot water, dish soap, and, of course, your range hood filter. You may also need a scrub brush or toothbrush for stubborn dirt.
Safety First
Safety should always be a priority. Ensure that your range hood and stove are turned off and cool before starting the cleaning process. You don’t want to risk burns or accidents.
Remove the Filter
Most range hoods have easy-to-remove filters. Usually, you’ll find a latch or a couple of screws holding it in place. Use your screwdriver to release the filter gently. Be sure to check your appliance’s manual if you’re unsure how to do this.
Soak in Hot, Soapy Water
Once the filter is out, fill your bucket with hot water and add a generous amount of dish soap. Submerge the filter and let it soak for about 10-15 minutes. This will help loosen the built-up grease and grime.
Scrub Away the Grime
After soaking, take your scrub brush or toothbrush and start gently scrubbing the filter. Pay extra attention to any areas with stubborn grease spots. You may need to repeat this step a few times until the filter is clean.
Rinse and Dry
Thoroughly rinse the filter with clean water to remove all soap residue. Make sure it’s completely dry before reattaching it to your range hood. A wet filter can lead to mold growth and decreased efficiency.
Regular Maintenance
To keep your kitchen smelling fresh, make cleaning your range hood filter a regular part of your routine. Depending on how often you cook, you might need to do this every few months. Regular maintenance will extend the life of your filter and ensure your kitchen remains an inviting space.
“Simplifying the Process: How to Easily Remove a Range Hood Filter”
Maintaining a clean and efficient kitchen is crucial for anyone who enjoys cooking or spending time in this essential part of the home. One often-overlooked aspect of kitchen maintenance is the range hood filter.
A dirty or clogged filter can reduce the effectiveness of your range hood and compromise air quality in your kitchen. In this guide, we’ll walk you through the simple steps to remove a range hood filter, ensuring that your kitchen remains a healthy and odor-free space.
Materials You’ll Need
Before you start, gather the necessary materials:
Safety Gear
: Always put safety first. Grab a pair of gloves and safety goggles to protect your hands and eyes from any potential debris or cleaning agents.
Screwdriver:
You’ll need a screwdriver to remove any screws securing the filter in place.
Cleaning Supplies
: Have some dishwashing liquid, warm water, and a scrub brush or sponge ready for cleaning the filter.
Locate Your Filter
Range hood filters are typically located either underneath the hood or on its sides. Consult your range hood’s manual if you’re unsure about the filter’s location. It’s essential to turn off the range hood and unplug it from the power source before starting the removal process for safety reasons.
Underneath Filters
If your filter is located underneath the hood, you’ll likely need to remove a cover first. This cover is usually secured with screws. Use your screwdriver to remove them, then carefully take off the cover.
Slide-Out Filters:
Some range hoods have filters that slide out from the sides. In this case, gently slide the filter out of its housing.
Release Clips:
Occasionally, filters are held in place by clips or latches. If this is the case, carefully release these clips to detach the filter.
Clean the Filter
Once you’ve successfully removed the filter, it’s time to clean it. Fill a sink or basin with warm water and add a few drops of dishwashing liquid. Submerge the filter and let it soak for about 10-15 minutes to loosen the grease and grime.
After soaking, use a scrub brush or sponge to gently scrub the filter. Pay extra attention to any stubborn spots. Rinse thoroughly with clean water and allow it to air dry completely before reinstalling it.
Reinstall the Filter
Once your filter is clean and dry, it’s time to put it back in place. Follow the reverse steps of removal:
Underneath Filters:
If you had to remove a cover, reattach it using the screws you removed earlier.
Slide-Out Filters:
Carefully slide the filter back into its housing until it clicks into place.
Release Clips:
If clips or latches were used, secure the filter by re-engaging them.
Test Your Range Hood
After reinstallation, plug your range hood back in and turn it on to ensure everything is working correctly. You should notice improved airflow and reduced odors with your clean filter.
Regular Maintenance
To keep your kitchen’s air clean and your range hood functioning optimally, it’s essential to clean the filter regularly. Depending on your cooking habits, aim for cleaning every 1-3 months.
By following these simple steps, you can easily remove and clean your range hood filter, ensuring a healthier and more enjoyable cooking experience.
“Trouble-Free Technique: Removing Range Hood Filters Hassle-Free”

Maintaining a clean and efficient kitchen is essential for every home chef. One often overlooked but crucial aspect is the range hood filters. These filters help to trap grease, smoke, and odors, ensuring that your kitchen stays fresh and your air remains clean.
However, over time, they can become clogged and dirty, affecting their performance. In this note, we’ll explore a straightforward technique to effortlessly remove and clean your range hood filters.
Gather Your Supplies
Before diving into the process, gather the necessary supplies. You’ll need a screwdriver, a large basin or sink, hot water, dish soap, and a soft brush or sponge.
Turn Off the Power
Safety comes first. Ensure your range hood is turned off, and if it’s connected to electricity, switch off the circuit breaker to avoid any accidents.
Locate and Remove the Filters
Most range hoods have filters located either underneath or inside the hood. Use the screwdriver to carefully remove the screws holding the filters in place. Gently pull the filters out once the screws are removed.
Soak in Soapy Water
Fill your basin or sink with hot water and add a few drops of dish soap. Submerge the filters completely and let them soak for about 10-15 minutes. This will help loosen the grease and grime.
Scrub Gently
After soaking, use a soft brush or sponge to gently scrub the filters. Pay extra attention to the areas with stubborn grease buildup. Avoid using abrasive materials that could damage the filters.
Rinse and Dry
Thoroughly rinse the filters with clean water to remove any soap residue. Shake off excess water and allow them to air dry completely before reinstallation. This step is crucial to prevent mold or mildew growth.
Reinstall Filters
Once the filters are completely dry, place them back into the range hood, and secure them with the screws. Ensure they are properly aligned and secure before restoring power to your range hood.
“Mastering the Craft: Expert Tips for Range Hood Filter Removal”
When it comes to keeping our kitchens clean and smoke-free, range hoods play a vital role. Over time, though, the filters in these hoods can become clogged with grease and grime, reducing their effectiveness.
To maintain a healthy and well-functioning kitchen, it’s essential to know how to remove and clean these filters. Here are some expert tips to help you tackle this task with ease.
Understanding Your Range Hood Filter
Before diving into the removal process, it’s crucial to understand the type of filter your range hood uses. There are two common types: metal and charcoal filters.
Metal filters are washable and reusable, while charcoal filters need replacement once they become saturated. Knowing which type you have will guide your maintenance routine.
Gathering the Right Tools
Before attempting to remove the filter, make sure you have the necessary tools at hand.
You’ll typically need a screwdriver, a bucket or sink large enough to hold the filter, dish soap, a soft brush, and a towel or paper towels for drying. Having everything ready will streamline the process.
Safety First: Turn Off the Power
Ensure your safety by turning off the power to your range hood. You can do this by either unplugging it or switching off the circuit breaker. This precaution is essential to prevent any electrical accidents while working on the filter.
Removing the Filter
Most range hoods have a latch or clip that secures the filter in place. Use your screwdriver to loosen or remove these fasteners carefully. Once you’ve done this, gently slide out the filter. Be cautious not to apply too much force, as this can damage the hood or filter.
Cleaning the Filter
For metal filters, cleaning is a breeze. Simply soak the filter in hot, soapy water for a few minutes to loosen the grease and grime.
Then, use a soft brush to scrub away any remaining residue. Rinse thoroughly and allow it to air dry before reinstallation. Charcoal filters, on the other hand, must be replaced when they become saturated.
Reinstalling the Filter
After cleaning or replacing the filter, slide it back into its original position and secure it with the latches or clips. Ensure it is snug and secure to guarantee proper functionality.
Conclusion
In conclusion, taking care of your range hood filter is essential for a clean and healthy kitchen. Removing it might seem tricky, but it’s actually quite simple. Just remember to turn off the hood and follow the steps we discussed. Regular cleaning will ensure your range hood works efficiently and keeps the air in your kitchen fresh. So, don’t hesitate to give your filter a little TLC now and then. Your kitchen and your lungs will thank you for it!
Frequently Asked Question(How To Remove Range Hood Filter)
How do you remove and clean a range hood filter?
To clean a range hood filter, start by ensuring your range hood is turned off and unplugged for safety. Depending on your hood’s design, you’ll typically find the filter either underneath the hood or inside it. If it’s underneath, simply reach up and locate the clips or latches securing the filter in place. Gently release them, and the filter should come loose. If it’s inside the hood, you may need to remove a cover or panel first. Once you’ve accessed the filter, take it out carefully.
To clean the filter, you can soak it in a mixture of warm water and a mild degreasing detergent. This helps to break down the grease and grime. You can also scrub it with a soft brush or sponge to remove any stubborn residue. Rinse it thoroughly with clean water and let it dry completely before placing it back in the range hood. Regular cleaning of the filter helps maintain the efficiency of your range hood in removing cooking odors and smoke.
How do you remove a commercial kitchen hood filter?
Removing a commercial kitchen hood filter is similar to removing a residential range hood filter, but the filters in commercial setups can be larger and heavier. First, turn off the kitchen exhaust system and ensure it’s safe to work around.
Then, identify the latches, clips, or bolts holding the filter in place. Carefully undo these fasteners, and with the help of another person if needed due to the size, lower the filter down. Be cautious as commercial hood filters tend to accumulate more grease and can be quite dirty.
Can you clean hood vent filter?
Yes, you can clean a hood vent filter. In fact, it’s essential to clean it regularly to maintain the performance of your kitchen exhaust system. Cleaning the hood vent filter involves removing it from the hood, soaking it in a degreasing solution or warm soapy water, and scrubbing away the accumulated grease and grime.
After a thorough cleaning, rinse it with clean water and let it air dry completely before reinstalling it in the hood.
Can you use range hood without filter?
While it is technically possible to use a range hood without a filter, it’s not recommended. The filter plays a crucial role in trapping grease, smoke, and odors generated during cooking. Without a filter, these particles can accumulate in the ducts and fan, leading to potential fire hazards and decreased efficiency of the hood.
Additionally, using a hood without a filter may allow more grease and cooking odors to escape into your kitchen, which can be unpleasant and unhealthy. It’s best to keep the filter in place and clean it regularly for optimal performance and safety.
How long do range hood filters last?
Range hood filters typically last for about 6 to 12 months, but this can vary depending on how often you cook and the type of cooking you do. If you cook frequently and produce a lot of greasy or smoky fumes, your filters may need replacement sooner. It’s essential to regularly check your range hood filters for signs of dirt and grease buildup.
When they become visibly dirty or clogged, it’s time to replace them. Keeping your filters clean is crucial because they help to remove airborne grease, odors, and smoke, improving the air quality in your kitchen and preventing the buildup of grease in your ductwork.
What is filter free hood?
A filter-free hood, on the other hand, is a type of range hood that doesn’t rely on traditional mesh or baffle filters to capture grease and smoke. Instead, it uses innovative technology like electrostatic precipitators or charcoal filters to remove contaminants from the air.
The advantage of a filter-free hood is that you don’t need to replace filters regularly, saving you the hassle and cost of filter replacements. However, it’s essential to clean and maintain the internal components of a filter-free hood to ensure its effectiveness over time. While filter-free hoods can be more convenient in terms of filter replacement, they may require more maintenance to keep them functioning optimally.